
Last updated: January 10, 2020
Set up a conversations inbox to streamline and centralize communication with your contacts. You can connect team emails and/or chat channels to the inbox, then view, reply, and manage all conversations from each channel in one place.
You can also connect another channel to your default conversations inbox. Learn more about setting up your default conversations inbox.
Create an inbox
- In your HubSpot account, click the settings icon in the top navigation bar.
- In the left sidebar menu, navigate to Conversations > Inboxes.
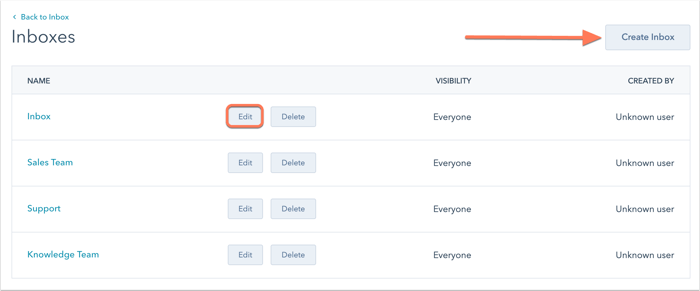
- Click Create Inbox.
- In the Team inbox name field, enter a name for your inbox.
- Click the Add team inbox members dropdown menu to choose who can see this inbox.
- Everyone: every HubSpot user in the account can see the inbox.
- Specific users and teams: only selected users or teams can see this inbox.
Please note: incoming conversations can only be automatically assigned to users with a paid seat, but free users can still assign and respond to unassigned conversations if they are included as a team member on the inbox.
If you choose Specific users and teams, users with Admin or Super Admin permissions can view any conversations inbox in the portal, but cannot take actions in the inbox, such as assigning a conversation or replying to a thread, unless they are included as a team member in the inbox settings.
- Click Next.
- Select a channel to connect. Connect a Team email to view and reply to any messages sent to your company email address or connect a Chat channel to view and reply to messages sent to your live chat or bot. You can also connect a Facebook Messenger account to view and reply to messages sent to your Facebook Business Page. Click one of the options below to skip to the instructions on connecting either a team email or a chat channel:
If you'd prefer to set up your channels later by editing the inbox, click Connect a channel later. When you first set up an inbox, you will connect one channel to start, but you can also connect additional channels at any time by editing your inbox.
In addition to team email, chat, and Facebook Messenger, learn how to connect a support form to the conversations inbox.
Connect a channel
Connect a team email channel
- Select Team email.
- Select Yes, this is a shared account.
- Click Next.
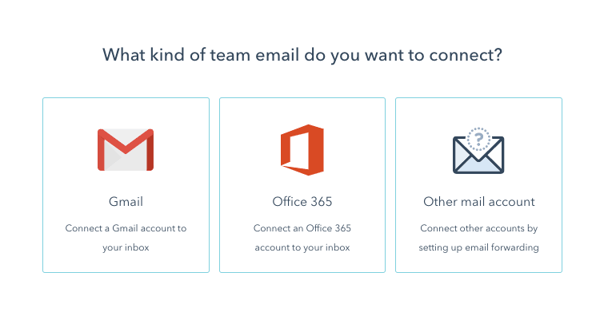
- Select Gmail, Office 365, or Other mail account. At this time, IMAP is not supported.
- To connect a Google Groups account or a hosted email account, select Other mail account, then follow the instructions in this article instead: Forward emails to a hosted email address in the conversations inbox.
Please note: only connect shared email addresses to the inbox; all incoming emails will be visible to your entire team. You cannot connect an email that is used as a user's connected inbox in HubSpot. If it is, the user will need to remove the connection before you can connect it to a conversations inbox.
- Review the terms for sharing this email account with HubSpot, then click Continue.
- Select the inbox you want to connect, enter your login credentials, and complete the connection process to allow HubSpot to access your inbox.
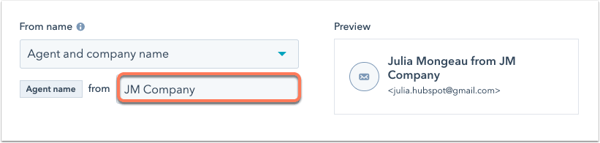
- You'll be redirected to the Email Details screen where you can customize the information that contacts will see when they receive an email from you. To customize the from name that displays, click the From name dropdown menu and select one of the following:
Please note: this feature is not supported by Office 365 connected inboxes due to technical limitations.
-
- Agent and company name: contacts will see the user's name and the company name when they receive an email. Enter the company name in the text field.
- Company name: contacts will see the company name when they receive an email. Enter the company name in the text field.
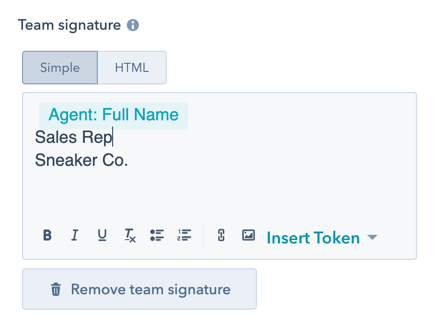
- To include a team email signature in emails you send from the inbox, select the Enable team signature checkbox.
Please note: this signature only applies to emails sent directly from the conversations inbox. If you send an email from a record in the CRM, the email signature you configured in your Profile & Preferences will apply.
- In the text box, customize your team email signature in the Simple editor.
- Use the rich text toolbar at the bottom to format the text, insert a link, or insert an image.
- To insert a personalization token that will populate the sender's full name or first name, click the Insert Token dropdown menu and select Full name or First name. When the contact receives an email from the team email address, the name of the user who sent the email will appear in the email signature.
- Or, click HTML and edit the signature in HTML.
- Preview how the from name and email signature will appear in the contact's inbox, then click Next.
- By default, incoming conversations are left unassigned for your team to triage. If you want to route the conversation to specific users and team members, click to toggle the Automatically assign conversations switch on.
- Click the Automatically assign incoming conversations to dropdown menu and select a routing option:
- Specific users and teams: route incoming emails to the user(s) or team(s) selected. Select the user(s) or team name(s) from the Specific users and teams dropdown menu.
- Contact owner: route incoming email to a contact's owner. The contact must have an owner assigned to their record and be tracked with a cookie. If the owner is offline, the submission will be emailed to the visitor's owner.
- Click the Automatically assign incoming conversations to dropdown menu and select a routing option:
- To create a ticket for each new conversation, click to toggle the Automatically create tickets switch on.
- To customize the ticket properties, click Edit ticket.
- Edit the properties in the right panel, then click Save.
Please note: if a visitor sends an email to the conversations inbox using an email address that is not already associated with a contact record in your account, HubSpot will automatically create a new contact record for that email.
- Click Connect & finish.
Your team email is now connected so you can compose and reply to emails in the conversations inbox.
Learn how to edit your inbox filtering rules, add a new team member to the inbox, or connect another team email channel.
Connect a chat channel
- Select Chat.
- Customize what visitors will see when they start a chat:
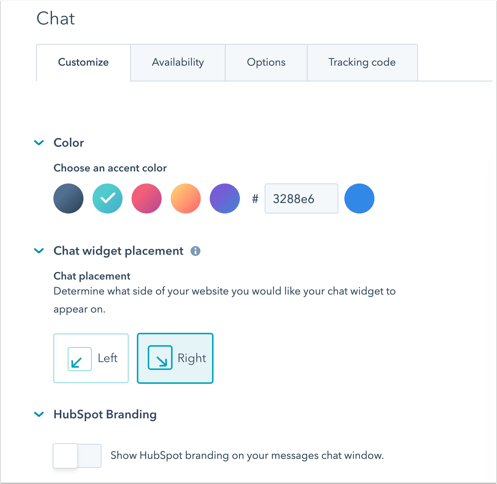
- To set the accent color for your chat widget, select a default color. You can also select a custom color by manually entering a hexadecimal, or clicking the color to the right of the hexadecimal value field and using the color gradient to select the color you want.
- Click the Chat heading dropdown menu and select the name and avatar to appear on the chat widget.
- Specific users and teams: select the checkboxes next to the names to display. If you select more than three users, their names and avatars will randomly appear on the chat widget. Learn how the chatflow's selected language will impact your chat heading.
- Custom name and avatar: display a generic team name and image.
- Contact owner: if the contact is known and has an owner, the contact owner's information will appear. Click the New visitor fallback dropdown menu and select a fallback option for any new or unassigned visitors who start a chat.
- In the text box, enter a welcome message that will appear when visitors first start a chat.
- To set who incoming conversations are routed to, click to toggle the Automatically assign conversations switch on, then click the Assign To dropdown menu. Learn more about setting up routing rules in your conversations inbox.
- To automatically display the welcome message when your pages load, select the Pop open the welcome message as a prompt checkbox.
- To specify which website page the chat widget should appear on, click Advanced options, then click the dropdown menus and enter specific website URLs and/or query parameters. Learn more about configuring your targeting rules.
- To set the accent color for your chat widget, select a default color. You can also select a custom color by manually entering a hexadecimal, or clicking the color to the right of the hexadecimal value field and using the color gradient to select the color you want.
- Click Next.
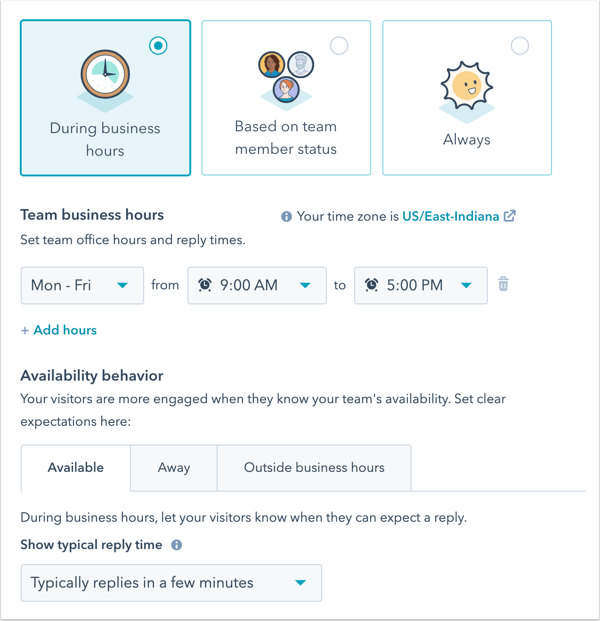
- Set when your team should appear available to chat and let visitors know when they can expect a reply. Select an availability option:
- During business hours: select During business hours to set consistent days and times when your team should appear available to chat. If your chatflow includes a bot, learn how customize the bot's availability preferences based on your inbox settings.
- Under Team business hours, use the dropdown menus to set your team’s availability. Click + Add hours to add additional day and time ranges.
- To set up the visitor's experience when your team is available, click the During business hours tab. Click the Show typical reply time dropdown menu to let visitors know when they can expect a reply. Then click the If all team members are 'away' or at capacity, then dropdown menu and select an away mode widget behavior.
- To set up the visitor's experience when your team is not available, click the Outside business hours tab. Click the dropdown menu and choose to either show an away message, show a reply time, or hide the chat launcher when a visitor comes to your site outside of business hours.
-
Based on team member status: visitors can chat with your team if at least one team member assigned in your routing rules is available.
-
To customize the automated message a visitor will see when they start a chat, click the Available tab, then click the Show typical reply time dropdown menu and select an option.
-
To customize the message that appears when no one is available to chat, click the Away tab. Enter your away message text or click the dropdown menu and select Hide chat launcher so the widget does not appear if no one is available.
-
-
Always: your team always appears available to chat. Use the Show typical reply time dropdown menu to let visitors know when they can expect a reply. If you don't wish to show visitors this information, select Don't show a reply time.
- Click Next.
- Preview how your chat widget will appear on different devices using the device type buttons above the preview. When you're done, click Publish.
After connecting your chat channel, learn how to customize your chat profile then start chatting with your website visitors. You can also edit your chat's appearance and availability at any time, or create a new chatflow in the inbox.
Connect a Facebook Messenger channel
- Select Facebook Messenger.
- Click Continue with Facebook.
- In the pop-up window, log in to your Facebook account.
Please note: pop-ups must be enabled in your browser in order to log in to your Facebook account from the pop-up window.
- Click Connect next to the Facebook Page you want to connect.
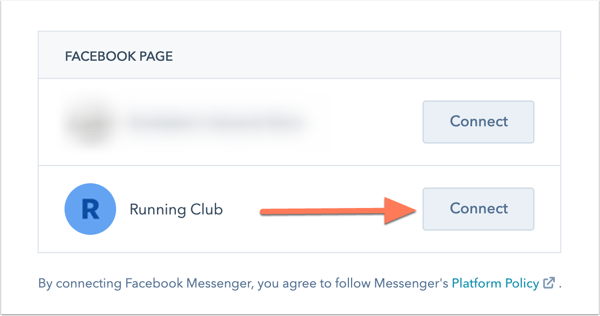
Please note: you cannot connect a Facebook Messenger account to more than one HubSpot account.
- In the Greeting text box, enter a message to display the first time a visitor starts a conversation with you.
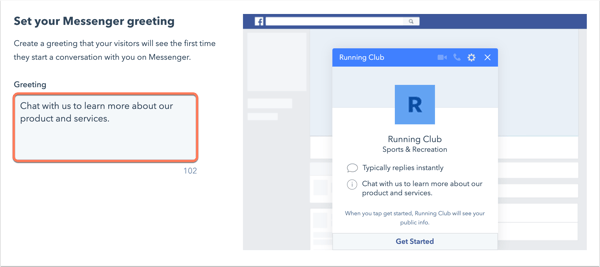
- Click Next.
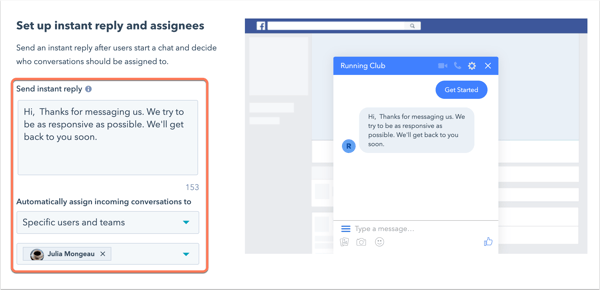
- To send a reply to visitors immediately after they send their first message, enter a response in the Send instant reply text box.
- To set who incoming messages are routed to, click the Automatically assign incoming conversations to dropdown menu and select a routing option. Learn more about setting up routing rules.
- Click Next.
- To preview how your greeting and instant reply will appear, use the Greeting and Instant reply buttons above the preview image.
- In the bottom right, click Done.
You'll be redirected to your inbox settings, where you'll see your Facebook Business Page listed with the status switch toggled on.
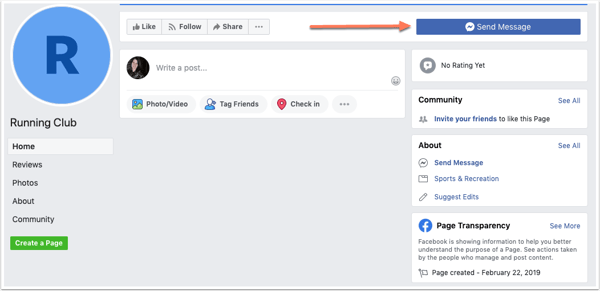
On your Facebook Business Page, when a visitor clicks the Send Message button, the Messenger window will open in the bottom right. The visitor can compose and send a message that will then appear in the conversations inbox. Learn how to respond to incoming messages in your conversations inbox.
Please note:
Edit your inbox
- To add or remove team members, connect a Slack account, edit the connected channels' settings, or connect another channel to the inbox, hover over the inbox and click Edit.
Please note:
- To edit the team members included on the inbox, select Team members in the left sidebar menu, then use the dropdown menu to edit who can see this inbox in their conversations inbox.
- To connect a Slack account to receive notifications about incoming live chats and respond directly from Slack, select Slack in the left sidebar menu. Learn how to integrate Slack with conversations.
- In the left sidebar menu, select Channels.
- Hover over an existing team email and click Edit.
- To edit the from name and team email signature your contacts see when you send them an email, select Configuration.
- To edit your routing rules, select Rules in the left sidebar menu.
- Click Save after making any changes.
-
- To edit your chat channel's appearance, navigate to Customize. You can also determine what side of your website you want the chat widget to appear on by clicking Chat widget placement, then selecting Left or Right.
-
- By default, after you close each chat, a copy of the chat transcript will be sent automatically to the visitor. Click the From address dropdown menu and select which email address the transcript should be sent from. You can only send chat transcripts from a shared connected inbox.
- If you don't want to automatically send the transcript, click to toggle the Automatically send a chat transcript at the end of a chat switch off.
- To edit your chat channel's appearance, navigate to Customize. You can also determine what side of your website you want the chat widget to appear on by clicking Chat widget placement, then selecting Left or Right.
-
- If you're adding the chatflow to a website that is not hosted with HubSpot, navigate to Tracking code. Click Copy, then add the code right before the </body> tag on every page you want the chat widget to appear. Or, you can send this code directly to your web developer.
- To edit your existing chatflows, navigate to Edit chatflows. Learn more about using chatflows.
Please note: the chat widget is not supported on websites built using Wix. In order to add a chat widget to your WordPress site, first install the HubSpot All-in-One Marketing - Forms, Popups, Live Chat WordPress plugin. Learn more about how to install the plugin on your WordPress site.
- Click Save after making any changes.
Edit your Facebook Messenger channel
After connecting your Facebook Messenger account to the inbox, you can edit the greeting, instant reply, and routing rules in your inbox settings. If you've enabled General Data Protection Regulation (GDPR) in your account, you can enable GDPR for a connected Messenger account to collect a visitor's consent to process their data.
- In the left sidebar menu, select Channels.
- Hover over a connected Facebook Messenger account and click Edit.
Please note: because Facebook Messenger's Profile API does not allow HubSpot to collect a visitor's email address, duplicate records might be created in your account if you have multiple Facebook Business Pages connected. If a visitor starts a conversation on both pages, a new contact record will be added to your account for each unique thread.
- On the settings page, you can edit the greeting message. You can also enable GDPR for this message:
- Click to toggle the Apply GDPR to Messenger switch on.
- Click the dropdown menu and select one of the following:
- Explicit consent: visitors need to click I agree before they can send a message.
- Implicit consent: visitors' consent is implied when they start a conversation with you. The consent to process data text will still display, but they do not need to click I agree to start the conversation.
- In the Consent to process data text box, enter text to explain why you need to store and process the visitor's personal information.
- Click Save.
Please note: while these features live in HubSpot, your legal team is the best resource to give you compliance advice for your specific situation.
